This article describes how to configure Spinnaker to send Slack notifications.
- Create A Slack Application
- Create A Bot
- Deploy The Bot
- Invite The Bot To A Channel
- Register The Slack Token With Spinnaker
- Test Spinnaker
Create A Slack Application
Go to the Apps Management URL and click on the “Create New App” button. Once done, you will get access to the basic configuration pane. You might want to customize some settings, like the color or the logo of your application at the bottom of it.

Create A Bot
Once the application has been created, you will create a Bot. Next, select the “Add features and functionality” menu and then select “Bots”.
Enter the following fields:
- The Bot Display Name
- The Bot Username
- The “Always Show My Bot as Online” to On
Deploy The Bot
Select the “OAuth & Permissions” menu, copy the Bot User OAuth Access Token this is the token needed in Spinnaker configuration, also on the Bot Token Scopes section add a scope of type chat:write like in the screenshot below:
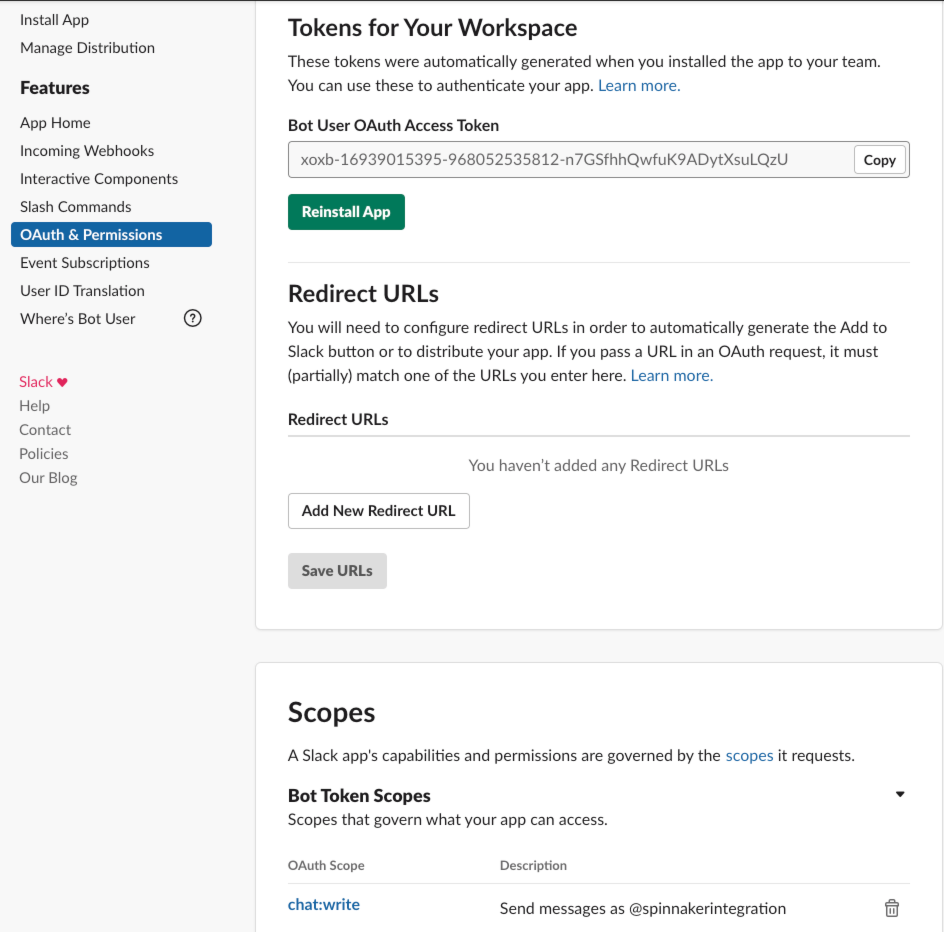
Select the “Install your app to your workspace” from the Bot “Basic Information” page and deploy it.
Invite The Bot To A Channel
Spinnaker only requires to be able to publish on a channel to interact with Slack. All you have to do is connect to a channel or create a new channel and name the bot you’ve just created. Slack will propose to invite the bot. Accept the invitation.
Register The Slack Token With Spinnaker
You are now ready to configure Spinnaker with the bot you’ve just registered.
-
Operator
Add the following snippet to the
SpinnakerServicemanifest:apiVersion: spinnaker.armory.io/v1alpha2 kind: SpinnakerService metadata: name: spinnaker spec: spinnakerConfig: config: notifications: slack: enabled: true botName: spinnaker # The name of your slack bot. token: xoxb-xxxxxxxx-xxxxxxxxxxxx-xxxxxxxxxxxxxxxxxxxxxxxx # Your slack bot token. This field supports "encrypted" secret references (https://docs.armory.io/spinnaker-install-admin-guides/secrets/)Apply the changes:
kubectl -n <spinnaker namespace> apply -f <SpinnakerService manifest> -
Halyard
Start by setting the variables below:
  export TOKEN_FROM_SLACK="xoxb-xxxxxxxx-xxxxxxxxxxxx-xxxxxxxxxxxxxxxxxxxxxxxx"
  export SLACK_BOT=spinnaker
Register the token and bot name in the configuration:
  $ echo $TOKEN_FROM_SLACK | hal config notification slack edit --bot-name \
     $SLACK_BOT --token
Set the configuration that enables Slack:
$ hal config notification slack enableRedeploy the configuration:
$ hal deploy apply
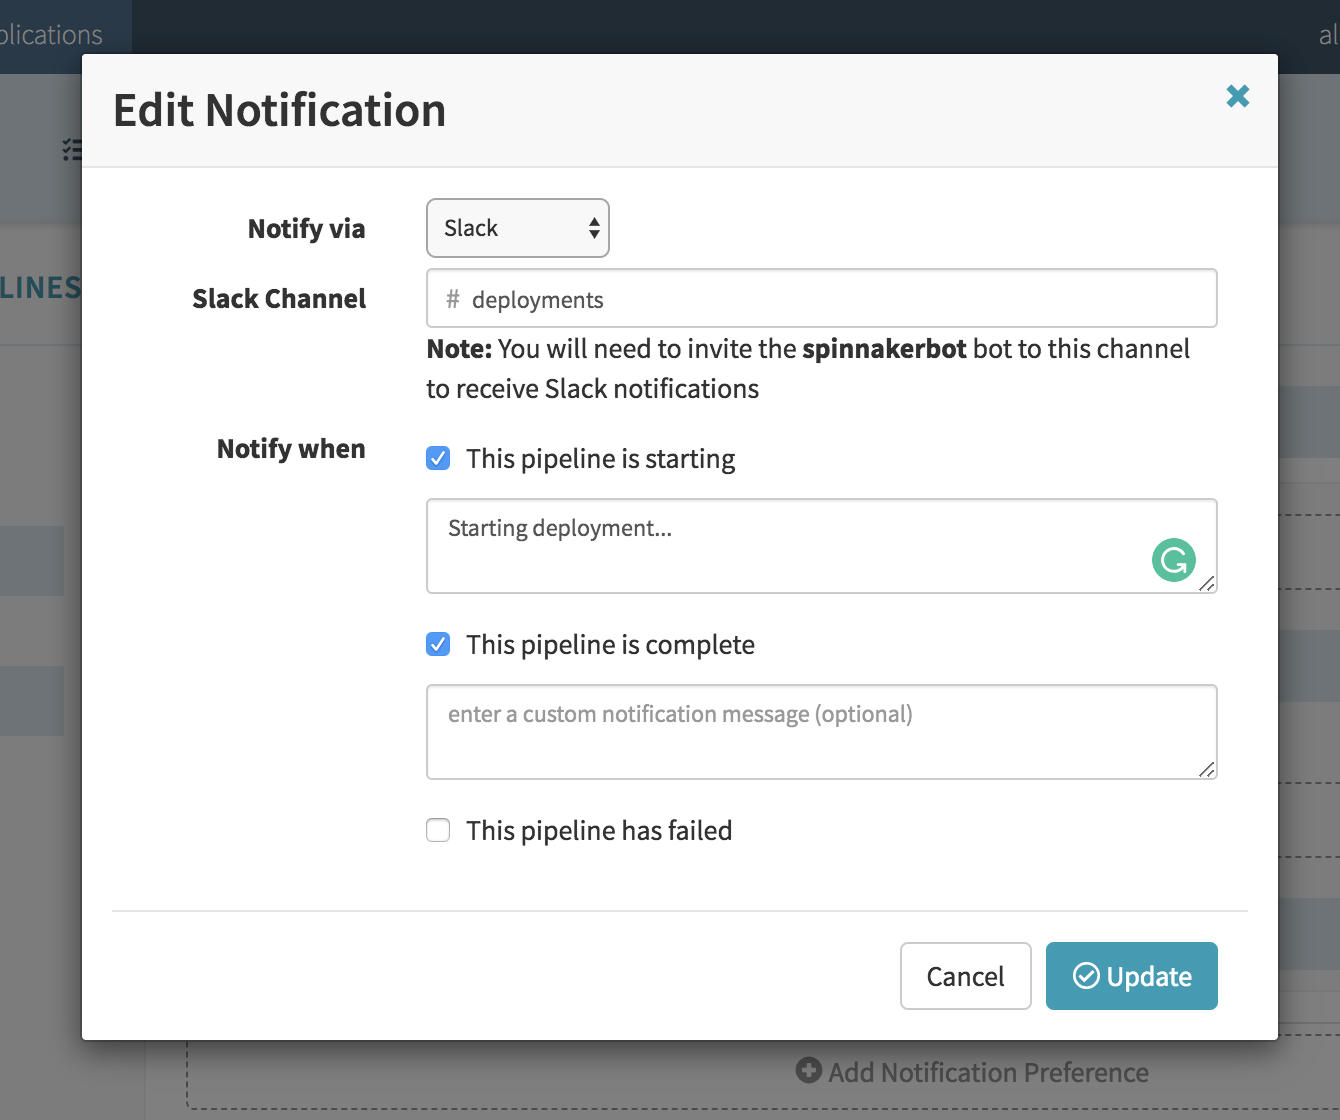
Test Spinnaker
You should then make sure Spinnaker can send the notifications as expected. You can configure a notification within a channel you have invited your bot in and test by running a test pipeline. See example below: