Overview
Before you can use the Terraform Integration stage, verify that Armory’s Terraform Integration for Spinnaker is enabled. For more information, see Enabling the Terraform Integration. To familiarize yourself with the Terraform stage, you can take a tour of the Terraform Integration Stage UI by watching the Terraform Integration UI video.
At the core of the Terraform Integration is the Terraformer service. This service fetches your Terraform projects from source and executes various Terraform commands against them. When a terraform stage starts, Orca submits the task to Terraformer and monitors it until completion. Once a task is submitted, Terraformer fetches your target project, runs terraform init to initialize the project, and then runs your desired action (plan or apply). If the task is successful, the stage gets marked successful as well. If the task fails, the stage gets marked as a failure, and the pipeline stops.
At a high level, a Terraform Integration stage performs the following actions when it runs:
- Authenticates to your repo using basic authentication credentials you provide. This can be a GitHub token or a BitBucket username/password combination.
- Pulls a full directory from your Git repository.
- Optionally uses a Spinnaker artifact provider (Github, BitBucket, or HTTP) to pull in a
tfvars-formatted variable file. - Runs the Terraform action you select.
- Creating a Terraform Integration stage
- Custom Plugins
- Viewing Terraform log output
- Consuming Terraform output via SpEL
- Submit feedback
Creating a Terraform Integration stage
To use the stage, perform the following steps:
- In Deck, select the Application and pipeline you want to add the Terraform Integration stage to.
- Configure the Pipeline and add a stage.
- For Type, select Terraform.
- Add a Stage Name.
- Configure the Terraform Integration stage.
The available fields may vary slightly depending on what you configure for the stage:
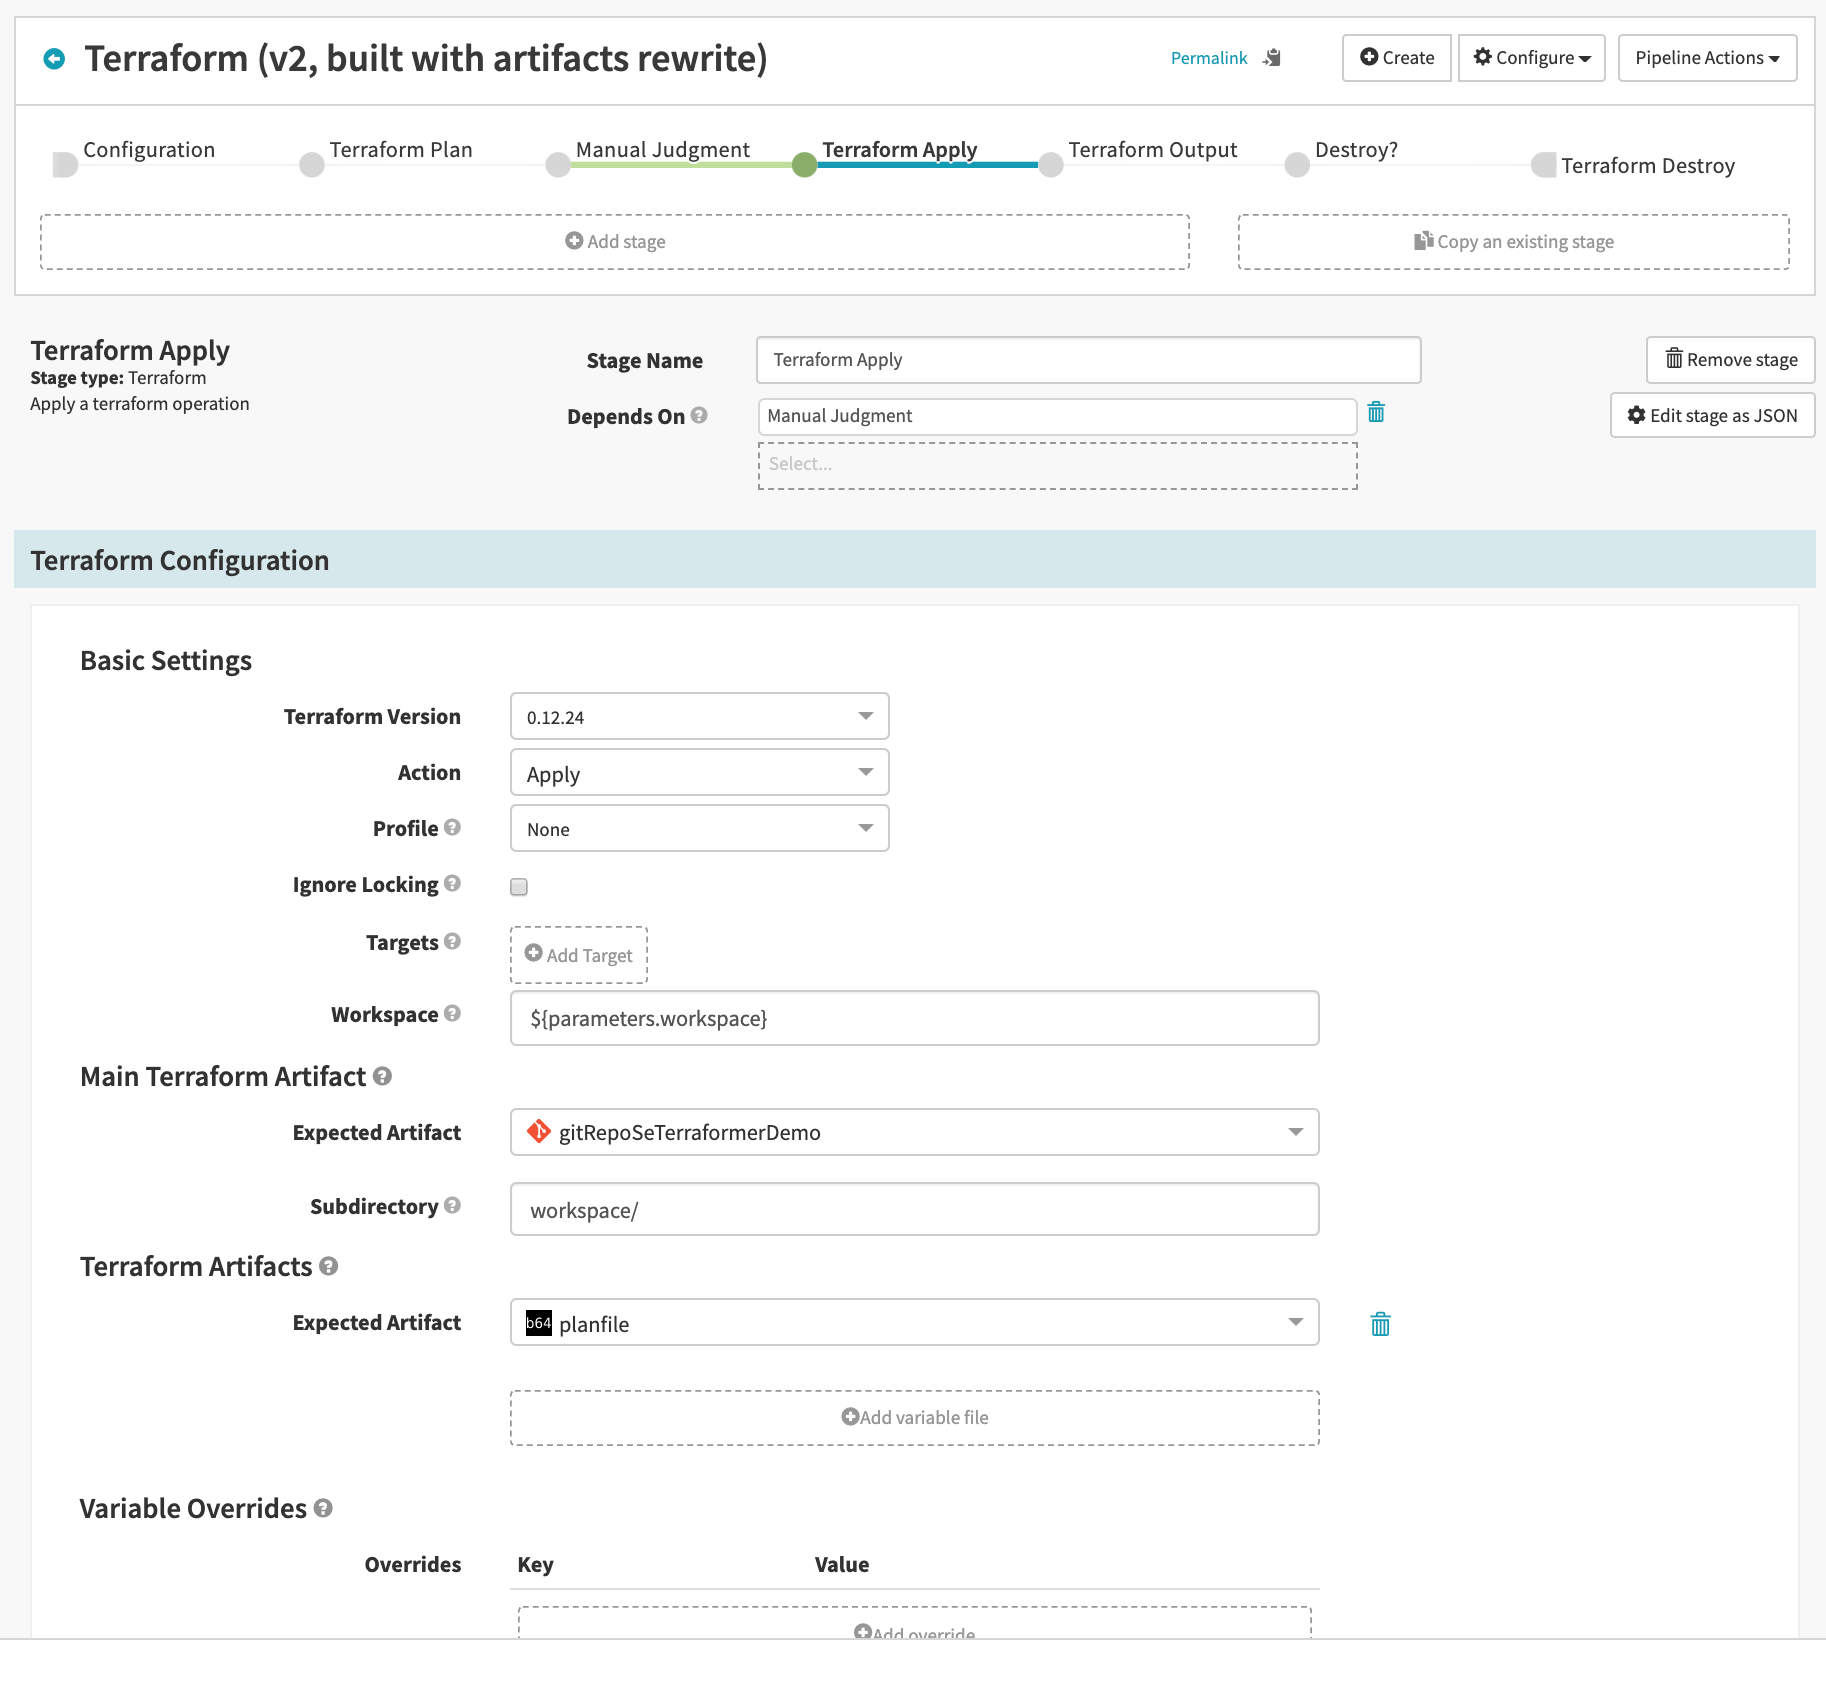
- Basic Settings
- Terraform Version: Terraform version to use. All Terraform stages within a pipeline that modify state (apply, output, destroy) must use the same version.
- Action: Terraform action to perform. You can select any of the following actions:
- Plan: The output of the plan command is saved to a base64-encoded Spinnaker artifact and is injected into context. You can use this artifact with a webhook to send the plan data to an external system or to use it in an
applystage. Optionally, you can select Plan for Destroy to view what Terraform destroys if you run the Destroy action. - Apply: Run
terraform apply. Optionally, you can ignore state locking. Armory recommends you do not ignore state locking because it can lead to state corruption. Only ignore state locking if you understand the consequences. - Destroy: Run
terraform destroy. Optionally, you can ignore state locking. Armory recommends you do not ignore state locking because it can lead to state corruption. Only ignore state locking if you understand the consequences. - Output: Run
terraform output.
- Plan: The output of the plan command is saved to a base64-encoded Spinnaker artifact and is injected into context. You can use this artifact with a webhook to send the plan data to an external system or to use it in an
- Targets: Scope execution to a certain subset of resources.
- Workspace: Terraform workspace to use. The workspace gets created if it does not already exist.
- Main Terraform Artifact
- Expected Artifact: Required. Select or define only one
git/repotype artifact.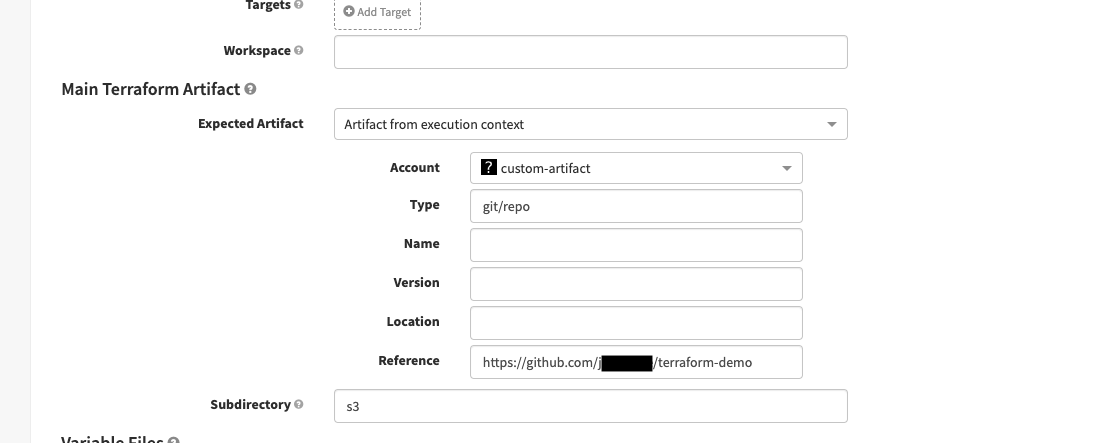
- Account: The account to use for your artifact.
-
URL: If you use a GitHub artifact, make sure you supply the API URL of the file, not the URL from the
RawGitHub page. Use the following examples as a reference for the API URL:Regular GitHub:
https://api.github.com/repos/{org}/{repo}/contents/{file path}Github Enterprise:
https://{host}/api/v3/repos/{org}/{repo}/contents/{file path} - Checkout subpath: Enable this option to specify a Subpath within a Git repo. Useful if you have a large repo and the Terraform files are located in a specific directory.
- Branch: The Git branch or commit to use.
- Subdirectory: Subdirectory within a repo where the
terraformcommand runs. Use./if the command should run at the root level.
- Expected Artifact: Required. Select or define only one
- Variable Files: Optional. Variable files that get appended to the Terraform command. Equivalent to running terraform apply with the
-var-fileoption.- If you want to use the output of a Plan stage for an Apply stage, select the Plan stage output as an Expected Artifact
- Variable Overrides: Optional. Key/value pairs used as variables in the Terraform command. Equivalent to running terraform apply with the
-varoption. You can use a GitHub or BitBucket -
Backend Artifact: Optional. Configuration stored outside of the primary repo that gets used for authenticating to a state backend. For example, if you want to use an S3 artifact for your backend state, specify it in this section.
For the
backendArtifactand other artifacts, you can replacegithub/filewith some other artifact type. For example, if you’re using the BitBucket artifact provider, specifybitbucket/fileand the corresponding artifact account.
- Basic Settings
Custom Plugins
The Terraform Integration supports the use of custom Terraform providers and plugins. The Terraform Integration downloads the plugins and injects them into each stage dynamically as needed to ensure the Terraform code can run.
Any plugin you want to use must meet the following requirements:
- Be a zip, tar, gzip, tar-gzip or executable
- If compressed, be at the root of the archive
- Be x86-64 (amd64) Linux binaries
- Have a SHA256 Sum
- Follow the Terraform plugin naming conventions
Note: If any Terraform Integration stage in a pipeline defines a custom plugin, all Terraform Integration stages must then define that same plugin in the pipeline.
Configuring Terraform plugins:
{
  "action": "plan",
  "artifacts": [
    {
      "reference": "https://github.com/someorg/terraformer",
      "type": "git/repo",
      "version": "refs/heads/branch-testing"
    },
    {
      "metadata": {
        "sha256sum": "fda6273f803c540ba8771534247db54817603b46784628e63eff1ce7890994e4"
      },
      "name": "terraform-provider-foo",
      "reference": "https://github.com/armory/terraform-provider-foo/releases/download/v0.1.19/terraform-provider-foo_0.1.19_linux_amd64.zip",
      "type": "terraform/custom",
      "version": "v0.1.19"
    }
  ],
 ...
}
The Terraform Integration caches all the defined plugins by default and does not redownload them. To configure the Terraform Integration to redownload a plugin, add the following JSON under the metadata key in the artifact object:
"metadata": {
    "sha256sum": "longString",
    "forceDownload": true,
}
Viewing Terraform log output
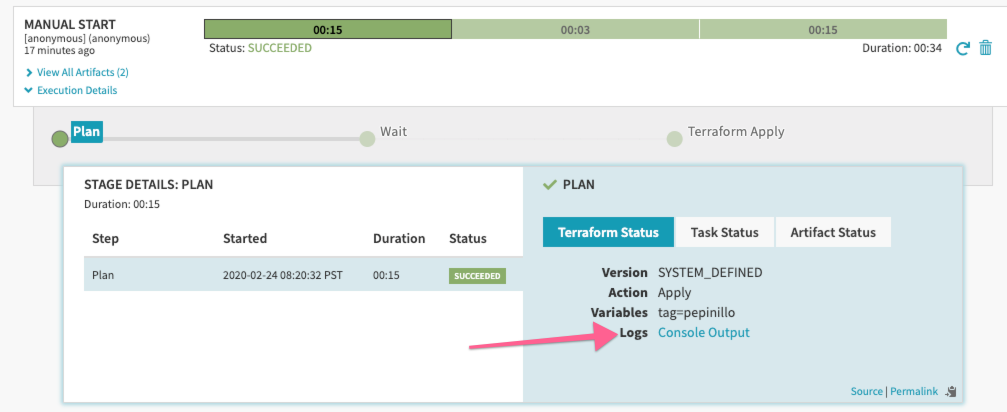
Terraform provides logs that describe the status of your Terraform action. When you run Terraform actions on your workstation, the log output is streamed to stdout. For Armory’s Terraform Integration, Spinnaker captures the log output and makes it available on the Pipelines page of Deck as part of the Execution Details. Exit codes in the log represent the following states:
0 = Succeeded with empty diff (no changes)
1 = Error
2 = Succeeded with non-empty diff (changes present)
For more information about Terraform logs, see the Terraform documentation.
Consuming Terraform output via SpEL
If you have a Terraform template configured with Output Values, then you can use the Output stage to parse the output and add it to your pipeline execution context.
For example, if you have a Terraform template that has this:
output "bucket_arn" {
    value = "${aws_s3_bucket.my_bucket.arn}"
}
Then you can set up an Output stage that exposes this in the pipeline execution context. If you have an Output stage with the stage name My Output Stage, then after running the Output stage, access the bucket ARN with this:
${#stage('My Output Stage')["context"]["status"]["outputs"]["bucket_arn"]["value"]}
Submit feedback
Let us know what you think at go.armory.io/ideas or feedback.armory.io. We’re constantly iterating on customer feedback to ensure that the features we build make your life easier!